


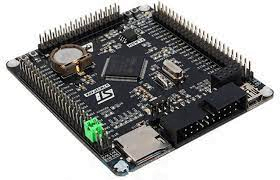
Programming STM32F407VET6 using Arduino IDE
The STM32F407VET6 is a microcontroller from the STM32F4 series, which is based on the ARM Cortex-M4 core. While the Arduino IDE is primarily designed for Arduino boards, it is possible to use it for programming STM32 microcontrollers as well, including the STM32F407VET6. However, some additional setup and configuration steps are required. Here’s a general overview of the process:
Install the Arduino IDE:
Download and install the latest version of the Arduino IDE from the official Arduino website (https://www.arduino.cc).
Install the Arduino STM32 core:
The Arduino IDE doesn’t natively support STM32 microcontrollers, but you can add support for them by installing the STM32 core. Open the Arduino IDE and go to “File” -> “Preferences.” In the “Additional Boards Manager URLs” field, add the following URL:https://github.com/stm32duino/BoardManagerFiles/raw/master/STM32/package_stm_index.json. Click “OK” to save the preferences.
Open the Boards Manager: Go to “Tools” -> “Board” -> “Boards Manager.”
Install the STM32 core:
In the Boards Manager, type “STM32” in the search box. You should see an option called “STM32 Cores by STMicroelectronics.” Select it and click on the “Install” button. This will download and install the necessary files for programming STM32 microcontrollers using the Arduino IDE.
Select the board:
Once the installation is complete, go to “Tools” -> “Board” and scroll down until you find the “STM32F4 Boards” section. Select the appropriate board from the list, in this case, “Generic STM32F4 series.”
Select the upload method:
Choose the appropriate upload method for your board, such as “STM32CubeProgrammer (Serial)” or “STM32CubeProgrammer (SWD).” The upload method depends on the hardware programmer you are using to connect to the STM32
Connect the hardware programmer:
Connect your hardware programmer (e.g., ST-Link, J-Link) to the STM32F407VET6 board.
Write your code:
Now you can write your Arduino code using the Arduino IDE. You can use the Arduino syntax and libraries, but keep in mind that the STM32 microcontrollers have more features and peripherals that may require direct register manipulation or using the STM32 HAL (Hardware Abstraction Layer) libraries.
Upload the code:
Once you have written your code, click on the “Upload” button in the Arduino IDE to compile and upload the code to the STM32F407VET6 microcontroller.
It’s worth noting that using the Arduino IDE with STM32 microcontrollers has some limitations compared to using dedicated STM32 development tools like STM32CubeIDE or PlatformIO. Those tools provide more advanced features and better integration with the STM32 ecosystem. However, if you are familiar with the Arduino IDE and prefer its simplicity, the above steps should allow you to get started with programming the STM32F407VET