


Interfacing of Buzzer with Arduino Step by Step Guide with Code.
An electric buzzer is an audio signaling device. It produces sound within 1 to 7 kHz frequency range. Buzzers are simple in use, light in weight, and available in affordable price.

You might have seen buzzers in electric doorbells, alarm clocks also in alarm management systems. Moreover, in keypad feedback, or some games.
Features of buzzers like affordable price, light in weight, and simple in use make them usable in various applications. Also, they are fun to play around with.
Here you get the step-by-step guide, how to interface buzzer with Arduino. so let’s get started!!
What is A Buzzer?
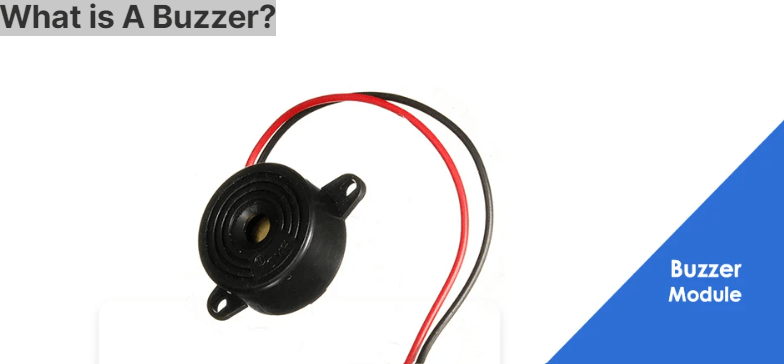
An electric buzzer, in other words, a beeper is an audio signaling device. It produces sound within the frequency range of 1 to 7 kHz as an audio indication.
However, the hearing threshold of buzzers is maximum in this frequency range. In addition, the sound of the buzzer is noticeable in a highly noisy environment.
Generally, buzzers/beepers used to give an audio indication in many applications. Moreover, it is used to produce the sound of a click, beep as well as ringing.
Types of Buzzers
The buzzers can be classified as active and passive buzzers. They differ in construction, size as well as specifications.
Based on construction following are the types of buzzers:
- Piezoelectric buzzers
- Magnetic buzzers
- Electromagnetic buzzers
- Mechanical buzzers
- Electromechanical buzzers
Piezoelectric Buzzers

The piezoelectric buzzer works on the principle of the piezoelectric effect. Therefore, the piezoelectric element is the main component of a buzzer. The element is composed of a piezoelectric ceramic as well as a metal plate.
Both the piezoelectric disc & the metal plate are held together with an adhesive. The piezo ceramic disc has electrodes attached to it.
In addition, a piezoelectric disc expands and contracts diametrically when an alternating current is applied to it. However, vibrations are produced in the piezoelectric element. This generates the sound of a particular frequency.
Magnetic Buzzers
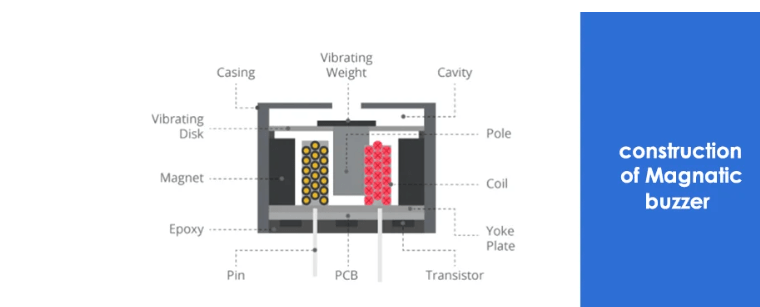
In a magnetic buzzer, a ferromagnetic disc is attached to a pole. The magnets around the pole keep the disc in a rest position. The coil in the ferromagnetic disc acts as an electromagnet.
When current is supplied to the coil, the disc is attracted to the coil. When there is no current in the coil, the disc returns to its rest position. The weight of the disc controls the vibrations of the disc.
Electromagnetic Buzzers
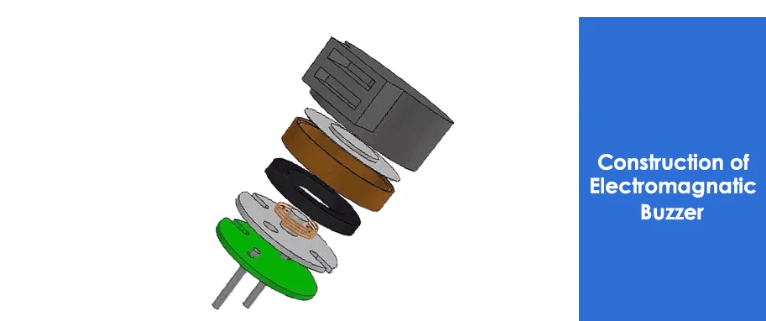
The electromagnetic buzzer is a combination of the oscillator, solenoid coil, magnet, vibration diaphragm as well as housing. once the power supply is ON the current is generated in an oscillator.
This current then passes through the solenoid coil. However, a magnetic field is generated and the vibration diaphragm vibrates periodically. Sound generates under the interaction of magnet and coil.
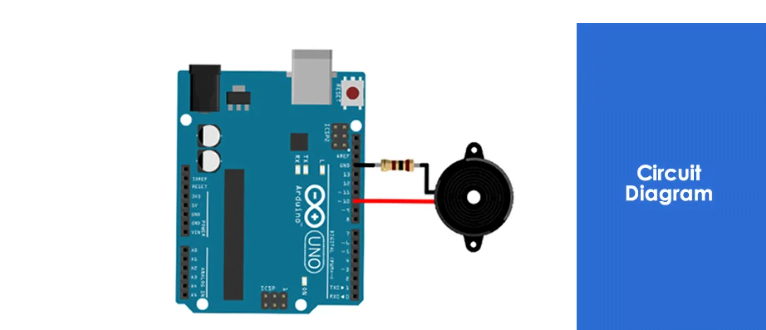
The Connections are pretty simple:
- Connect Supply wire (positive) of the buzzer to the Digital Pin of the Arduino.
- Connect Ground wire (negative) of the buzzer to Ground Pin on the Arduino, through a 100-ohm resistor.
That’s all of it.

Final words
Thanks for being with me till the end. Hope all your concepts about the buzzer, its types, and how to interface the buzzer with Arduino are clear.
If you like this article, let me know in the comment section. Also, feel free to give suggestions and share your experience while doing this experiment in the comment section.