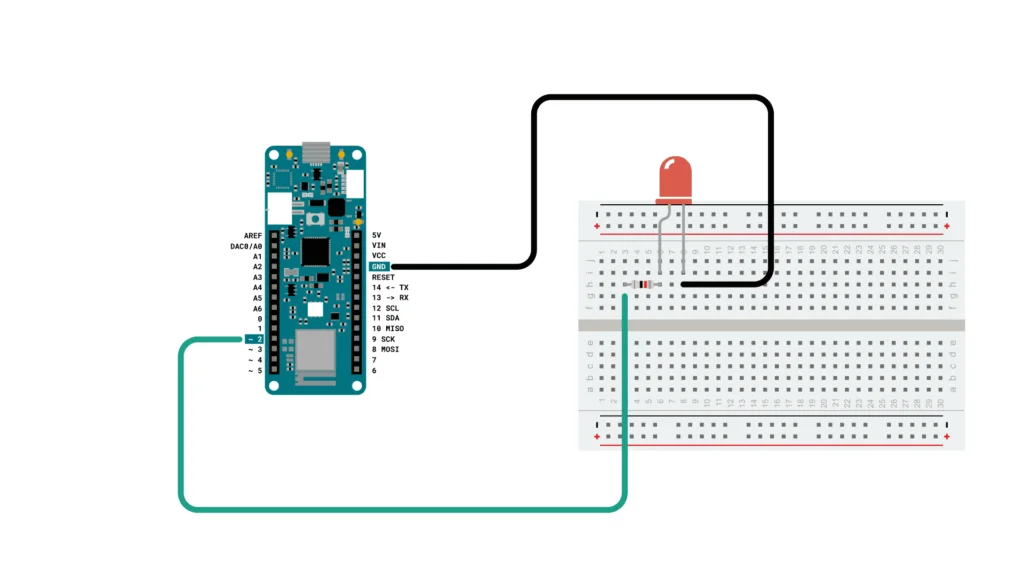
Controlling devices remotely with the Arduino MKR WiFi 1010 using its web server capabilities is a cool project! Here’s a basic outline of the steps involved:
Set Up Arduino MKR WiFi 1010:
Connect Arduino to WiFi:
- Write a sketch to connect the Arduino to your WiFi network using the h library.
Code-
#include <WiFi.h>
const char* ssid = “your-SSID”;
const char* password = “your-PASSWORD”;
void setup() {
Serial.begin(115200);
WiFi.begin(ssid, password);
while (WiFi.status() != WL_CONNECTED) {
delay(1000);
Serial.println(“Connecting to WiFi…”);
}
Serial.println(“Connected to WiFi”);
}
void loop() {
// Your code here
}
Create a Web Server:
- Use the WiFiServer and WiFiClient classes to create a basic web server.
Code-
#include <WiFi.h>
WiFiServer server(80);
void setup() {
Serial.begin(115200);
WiFi.begin(ssid, password);
while (WiFi.status() != WL_CONNECTED) {
delay(1000);
Serial.println(“Connecting to WiFi…”);
}
Serial.println(“Connected to WiFi”);
server.begin();
}
void loop() {
WiFiClient client = server.available();
if (client) {
Serial.println(“New client connected”);
// Handle the client’s request
client.println(“Hello from Arduino!”);
client.stop();
Serial.println(“Client disconnected”);
}
}
Handle Remote Commands:
- Extend your server to handle different paths or parameters in the URL, representing different commands.
Code-
void handleRequest(WiFiClient client) {
String request = client.readStringUntil(‘\r’);
client.println(“HTTP/1.1 200 OK”);
client.println(“Content-type:text/html”);
client.println();
if (request.indexOf(“/on”) != -1) {
// Code to turn on the device
client.println(“Device is ON”);
} else if (request.indexOf(“/off”) != -1) {
// Code to turn off the device
client.println(“Device is OFF”);
} else {
client.println(“Invalid command”);
}
client.stop();
}
Upload the Sketch:
- Upload your sketch to the Arduino MKR WiFi 1010.
Access the Web Server:
- Find the IP address assigned to your Arduino by the router.
- Open a web browser and navigate to that IP address.
Control Devices Remotely:
- Enter different URLs (e.g., http://arduino_ip/on) to control your devices remotely.
Remember, this is a simplified example. Depending on your project, you might need to implement security measures, handle more complex commands, and ensure the stability of your remote control system. Always consider security best practices, especially when controlling devices remotely.
Written by kanchan kan
- Industrial Automation141141 products
- Cooling Fan44 products
- Indicators1111 products
- Plastic Casing66 products
- Sensor2323 products
- Sleeve and cables55 products
- SMPS88 products
- Solid State Relay Module22 products
- Switches1818 products
- Temprature Sensor11 product
- 3D Printing180180 products
- 3D printing110110 products
- Combination Kit4747 products
- Electronic743743 products
- Audio55 products
- Battery/Charger Accessories2828 products
- Capacitors6464 products
- Connector4646 products
- cooling fan11 product
- Diode3535 products
- Displays1212 products
- IC and Chips6565 products
- IOT and Wireless99 products
- Leds2424 products
- Microcontrollers55 products
- Modules/Shield7575 products
- MOSFET / IGBT1414 products
- Power Supply2525 products
- Resistors130130 products
- Sensors5959 products
- SMD2828 products
- Switches1414 products
- Transistors6868 products
- Wire and Cables1212 products
- Hardware3232 products
- Hand Tools1414 products
- Hardware Accessories1414 products
- Printing22 products
- RC Plane and Drone99 products
- Robotic147147 products
- BO Motors1313 products
- General Purpose DC Motors2929 products
- Motor Drivers88 products
- Robotic Wheels & Tyres1414 products
- Servo Motor2727 products
- Stepper Motors88 products
- Synchronous Motor11 product
- Science Fair Project7070 products
- Final Year Ready Project Kit11 product
- STEM KIT2222 products
- E Books88 products


Leave a Reply
You must be logged in to post a comment.