


DIY Weighing Machine
What if you don’t need to pay some amount to weigh scale? You can make it on your home with a few sensors and boards. This tutorial is about building a homemade weighing machine using Arduino and load cell.
You may be aware of the weighing machine. While measuring the weight for the specific product, you take the help of this machine. It is easily available at stores. What if you make it at your home as most of the weighing machine uses a load cell to measure the weight. We will learn the interfacing of the load cell with an Arduino and calibrate the weight according to the setup we made. In addition, we will also learn how to show the measured data on a 16×2 LCD screen.

In the end, you will learn how to build a weighing machine implementing a load cell and as a weight sensor.
What is a Weighing Machine:
The weighing scale is a device used to measure mass or weight. It works with the help of a strain gauge sensor which is the load cell.
What does the Weighing Machine Measure?
The answer is force! And the way it is designed. It provides us with the human weight in newtons. But, normally, it will show you the weight in kilograms. While learning how it works, we can divide it into two parts: The sensing part and the processing part.
The sensing: This part contains a collection of sensors measuring the weight and converting it into electrical form for processing. The sensor used in the measurement is called a load cell.
Processing part: In the other parts, the data (Force) is received from the sensor and processed into a form that relevantly shows us the body’s weight.
The transducers (Load Cell) generate an electrical signal amplified using a high-quality signal amplifier suitable in the subsequent sections in the device.
After amplification of the analog signal is taken out by the processing part, it converts into a digital form with the help of a precision analog to digital converter. It will then display on the digital readout.
What You Will Learn?
- What load cell is and how it works
- Interfacing of loadcell with Arduino
- Build a digital scale with Arduino
- Use a load cell as a force gauge
What is Load Cell?
Before going further, let’s understand the simple concept behind load cell and how it works:
The load cell is a sensor or transducer which converts force into measurable electric signals. When you applied a force to the load cell, it converts its inner resistance/frequency to a micro-level electrical signal; later, you can amplify the signal with the help of the Hx711 amplifier. The signals can be varying voltage, varying current, or carrying frequency. You will find many types of load cell found in the market; we will see the two basic types of load cell:
Capacitive Load Cell :
It works on the principle of Change of capacitance which is the ability of a system to hold a certain amount of charge when a voltage is applied to it. In parallel plate capacitors, the capacitance is directly proportional to the dielectric between two plates and the overlap between the plates. It is inversely proportional to the gap between the plates.
Resistive Load Cell :
It works on the principle of Piezo-resistance, which states that when the force/ load is applied to the cell, it will change its resistance. Eventually, it leads to a change in output voltage.
A load cell consists of a metal core and a group of electrical resistances that transform when a force is applied to it. It comes to its original place after removing the force. The electrical circuit of a load cell is as follows:
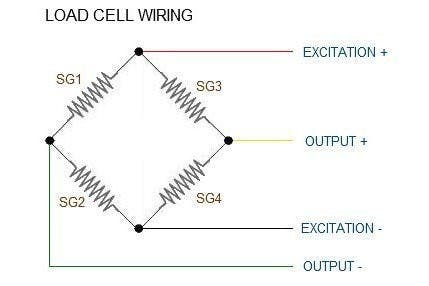
It has four wires as an output:
- Red: for excitation +
- Black: for excitation –
- White: for output +
- Green: for output –
What is Hx711?
HX711 is an analog to digital converter IC(ADC), especially used with a load cell. By connecting this IC to a microcontroller, you can read the resistance changes in the load cell. It also contains an on-chip low noise programmable amplifier with a gain of 32, 64, and 128.
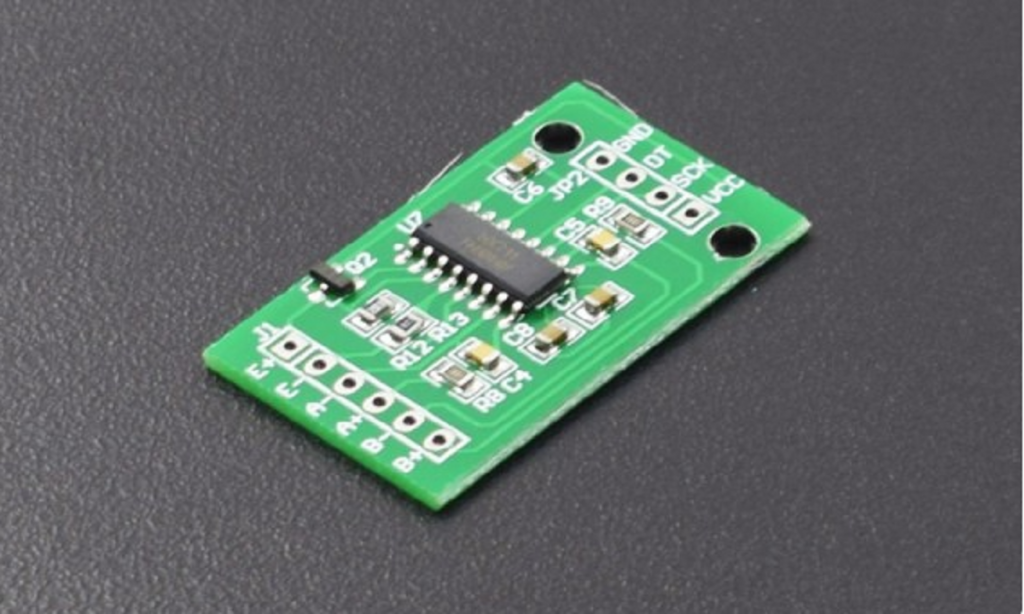
It is used for amplifying the digital signal and provide it to the microcontroller circuit. It also comes with an oscillator circuit and a regulated power supply. It also has other useful features which lead to fast response time and strong anti-interference.
If you want to read a detailed description of the load cell, you can get its datasheet by clicking the link below:
Connection of Load Cell With Arduino
The load cell can be connected to the Arduino through Hx711. Find the connection diagram below:
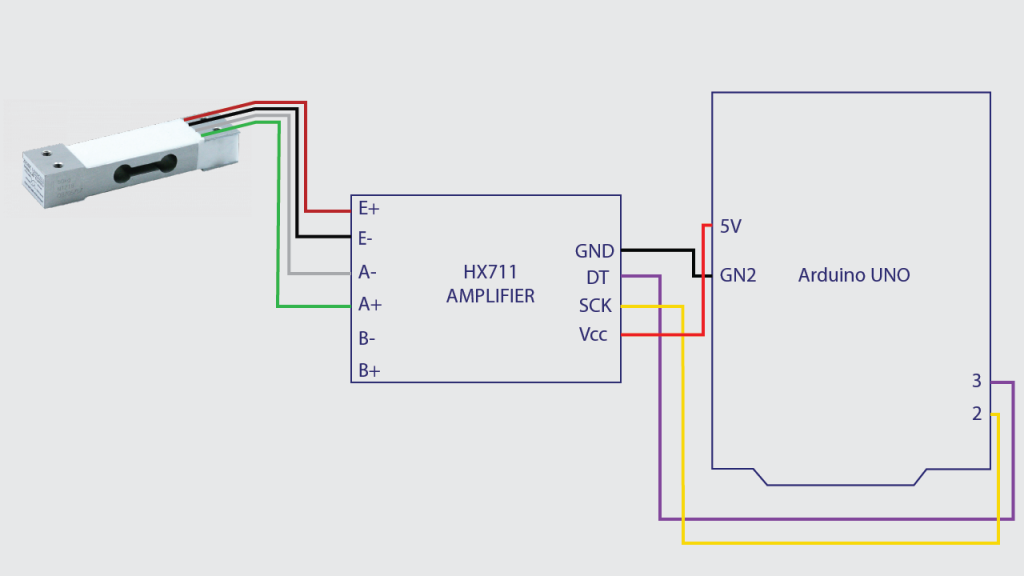
| Load cell | Hx711 | Hx711 | Arduino |
|---|---|---|---|
| Red | E+ | VCC | 5v |
| Black | E- | DT | 12 |
| White | A- | CLK | 11 |
| Green | A+ | GND | GND |
Setup of the load cell
To measure the weight using a load cell, we have to attach some wooden or fiber plate on the cell to put a load. The load cell is already designed to screw a nut to fix it with the wooden/fiber plate.
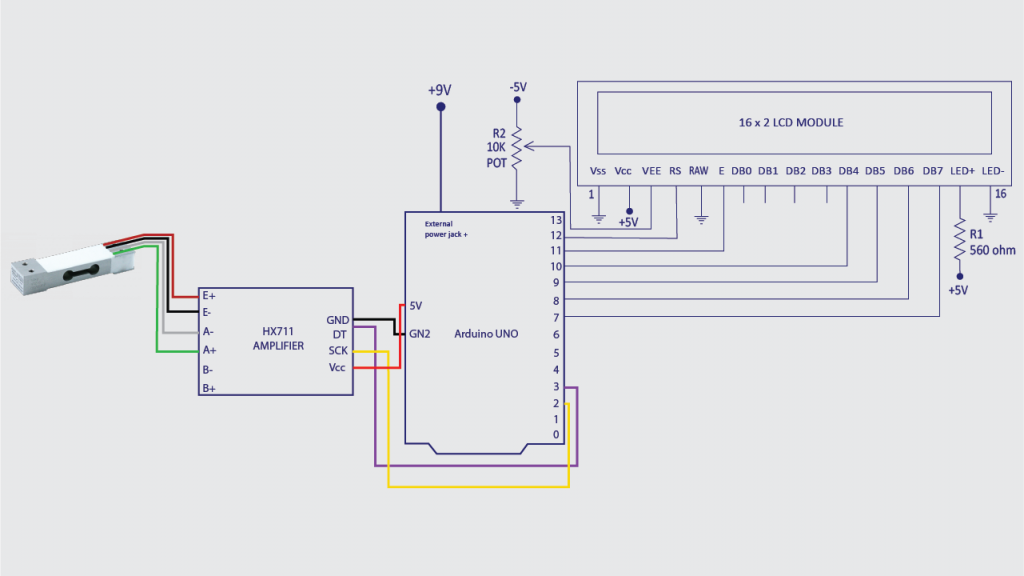
Interfacing of the 16×02 LCD
To display the weight on LCD, we have to connect 16×02 LCD with an Arduino. We have to make the following connections:

Connection Diagram of Circuit
The final interfacing connection diagram will be like this:
Programming of Load Cell
- Our first step will be downloading Arduino IDE Software.
- Now open the Arduino IDE and use the below code.
- But before that, you need to install the Hx711 library for Arduino. You can download the library from here.
Final Words
Thus with these simple steps, we have made our DIY weighing machine. I hope you enjoyed this tutorial. If you find any difficulty while designing it, please let us know in the comment section.