


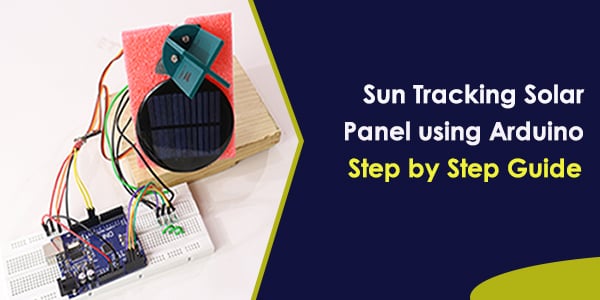
Sun Tracking Solar Panel Using Arduino Project – Step by Step Guide with Code
Here, we have designed the prototype of the Sun-Tracking Solar Panel using Arduino Uno. The servo motors are mounted on the 3D printed rotating fixture to rotate the solar panel.
Nowadays, we can see the use of a solar system is everywhere. The sunlight is a natural and free source of energy. The Sun emits solar radiations or electromagnetic radiations. In the solar energy system, these radiations are used to generate electricity with the help of Photovoltaic cells or Solar cells. In this tutorial, we are going to learn about the prototype of the Sun Tracking Solar Panel Using Arduino.
Before understanding the working and advantages of the Solar Tracker, we need to know why we have built this Solar Tracker.
Need for Solar Tracker
Rotationally every season comes with its translation movements which affect the cycles of day-night and the temperature differences around the world. Electromagnetic radiation depends on these movements. These radiations will change depending on the latitude and the time of the year.
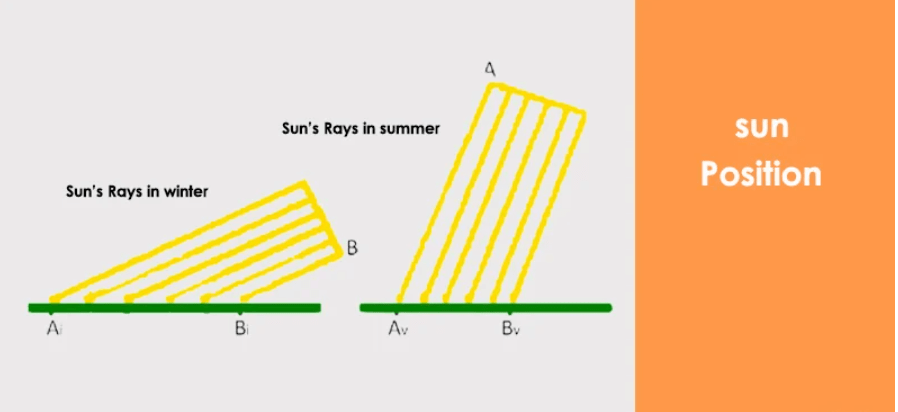
The above image shows the angle of incidence of sun rays at noon and on a horizontal surface in winter and summer. Thus, daily solar orientations vary depending on the latitude and they directly affect the angle of incidence of sun rays. This angle of incidence is a key point in producing solar energy.
Therefore, a Solar Tracking System is essential to know the exact orientation and inclination of our location.
Types of solar tracking system
As per the mode of motions, the solar tracking system is classified into two types,
- Single-axis solar tracking system
- Dual-axis solar tracking system
There are two horizontal axes and one vertical axis for a moving surface. The surface rotates around each axis to get the right angle for receiving the maximum sunlight.
In a Single-axis tracking system, the adjustment of the surface happens around only one axis. And in the dual-axis tracking system, the rotation of the surface happens by rotating around two axes simultaneously.
Advantages of solar tracking system
- On the same amount of space, solar trackers generate more electricity than a fixed solar system which makes them ideal for optimizing land usage.
- There are two kinds of solar trackers, such as single-axis and dual-axis. A suitable solar tracker can be installed according to the Installation size, local weather, degree of latitude and electrical requirements
- Solar trackers generate more electricity than their stationary solar system due to direct exposure to solar rays.
- Also, the tracker system does not require long term maintenance because of the advancements in technology and reliability of mechatronics.
- In certain states, some utilities offer Time of Use (TOU) rate plans for solar power. This utility will purchase the power generated during the peak time of the day at a higher rate. The solar tracking system is used to maximize the energy gains during these peak time periods.
How it will work?
The solar panel uses photovoltaic cells (PV cells). The PV cells detect the light intensity and according to that, the tracker adjusts the direction that a solar panel to the position of the Sun in the sky.
Every time, the tracker adjusts the panel perpendicular to the Sun so more sunlight strikes the solar panel, less light is reflected. Hence, it absorbs more energy which can be converted into power.
Building a Rotating fixture
In this sun-tracking solar panel using Arduino, we are using 3D printed accessories to make a rotating fixture. Here, we have designed the necessary small parts for the movement. In your project, you can use anything like cardboard, wood, plastic etc to make this fixture.
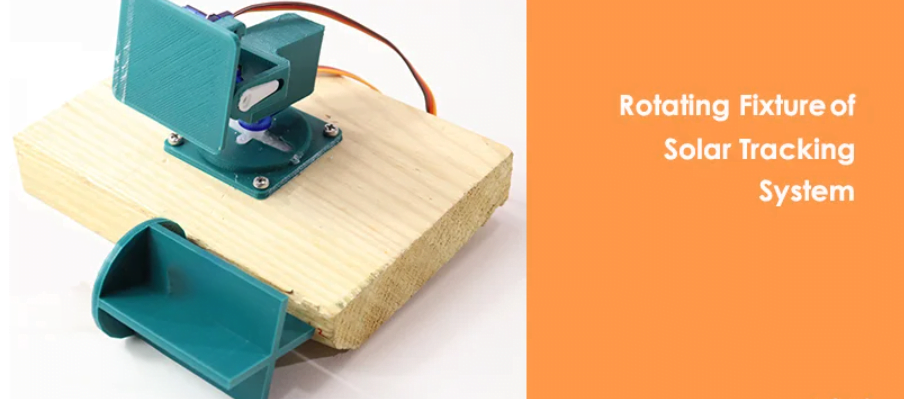
Here, is our final assembly for the solar panel rotating structure. We have used 2 servo motors for horizontal and vertical movement. On the upper side, we have fixed 4 LDR (light dependant resistor) to detect the sun(light) intensity.
You can download the required STL files to make this 3D printed parts for rotating fixture by clicking on the link below.
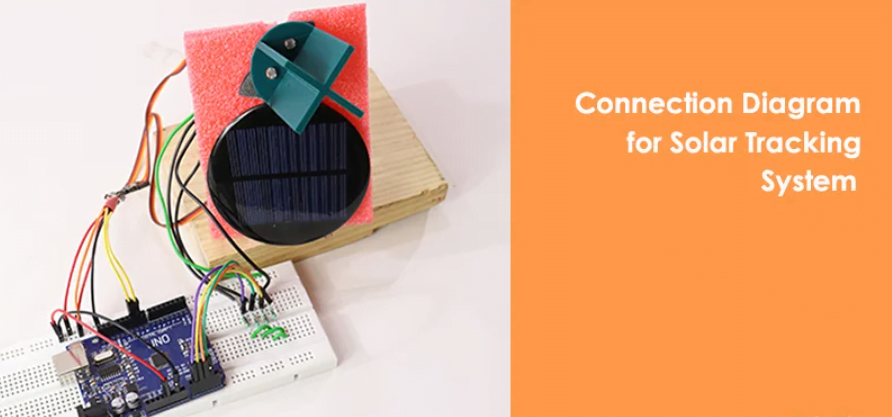
Connection Diagram
The below image shows the connection of the LDR sensor and servo motor with Arduino Uno. The Arduino Uno takes an analog input from the LDR sensor and according to their values, the servo will rotate.
Software & Code
Download the Arduino IDE Software for this code from the below links,
#include <Servo.h>
//definiamo i servomotori orizzontale e verticale
Servo servohori;
int servoh = 0;
int servohLimitHigh = 160;
int servohLimitLow = 60;

Servo servoverti;
int servov = 0;
int servovLimitHigh = 160;
int servovLimitLow = 60;
//Pin fotoresistenze
int ldrtopl = 2; //top left
int ldrtopr = 1; //top right
int ldrbotl = 3; // bottom left
int ldrbotr = 0; // bottom right

 void setup ()
 {
  servohori.attach(10);
  servohori.write(60);
  servoverti.attach(9);
  servoverti.write(60);
  Serial.begin(9600);
  delay(500);

 }

void loop()
{
  servoh = servohori.read();
  servov = servoverti.read();
  //Valore Analogico delle fotoresistenza
  int topl = analogRead(ldrtopl);
  int topr = analogRead(ldrtopr);
  int botl = analogRead(ldrbotl);
  int botr = analogRead(ldrbotr);
  // Calcoliamo una Media
  int avgtop = (topl + topr) ; //average of top
  int avgbot = (botl + botr) ; //average of bottom
  int avgleft = (topl + botl) ; //average of left
  int avgright = (topr + botr) ; //average of right

  if (avgtop < avgbot)
  {
    servoverti.write(servov +1);
    if (servov > servovLimitHigh)
     {
      servov = servovLimitHigh;
     }
    delay(10);
  }
  else if (avgbot < avgtop)
  {
    servoverti.write(servov -1);
    if (servov < servovLimitLow)
  {
    servov = servovLimitLow;
  }
    delay(10);
  }
  else
  {
    servoverti.write(servov);
  }

  if (avgleft > avgright)
  {
    servohori.write(servoh +1);
    if (servoh > servohLimitHigh)
    {
    servoh = servohLimitHigh;
    }
    delay(10);
  }
  else if (avgright > avgleft)
  {
    servohori.write(servoh -1);
    if (servoh < servohLimitLow)
     {
     servoh = servohLimitLow;
     }
    delay(10);
  }
  else
  {
    servohori.write(servoh);
  }
  delay(50);
}
The Final Output
The below GIF shows the final output of the Sun-Tracking Solar Panel using Arduino Uno,
Final Words
Hope this article helps you to understand the concept of a Solar tracking system, it’s importance and the prototype of a sun-tracking solar panel using Arduino Uno. Similarly, you can implement the real-time based solar tracker at your home.