


Interfacing Gesture Sensor with Arduino.
In this article, we will learn about APDS-9960 RGB and Gesture Sensor in detail. We will see its working, applications, and interfacing with Arduino with Code.
Gesture sensor is widely used and heavily studied over the globe. As a result, most smartphones have a feature of using gestures control nowadays, instead of using buttons. Touchless gesture control is a frontier in the world of human-machine interfaces. You can control major things by sensing touch with the help of this sensor.
Here all you have to do is swipe your hand over this sensor, and you can control any Robot, computer, HMI (Human-machine Interface), Games, Smartphones, etc. This method of controlling any device saves much more time. Also, it is easy to handle, and it looks cool to control things by using gestures.
Today, we will learn some basics about the gesture sensors, how exactly gesture sensor works, how to interface gesture sensor with Arduino, and how to control things using gesture sensors. Isn’t is exciting?? so let’s get started!!
What are Gestures?
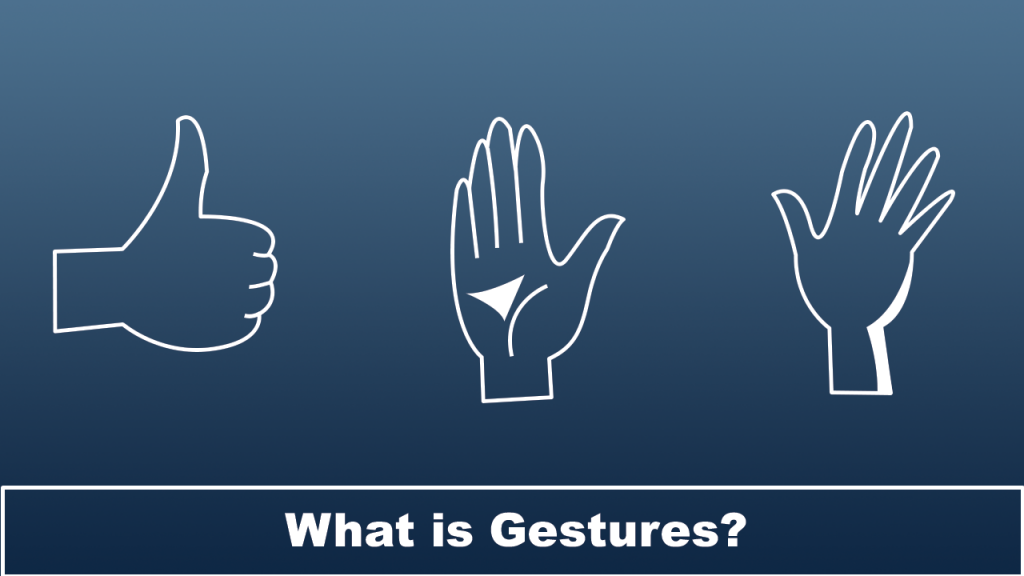
A gesture is a part of non-verbal communication, in which visible bodily actions can indicate a particular message. Here, the gesture includes the movement of hands. By detecting these movements, one can control the actions without contacting the actual device.
In this case, the gestures that users can detect are Left, Right, Up, Down, Forward, Backward, Clockwise, Anticlockwise, and waving. These are the basics. Moreover, you can add right-left, left-right, up-down, down-up, forward-backward, backward-forward.
Introduction to the APDS-9960 Digital Proximity RGB & Gesture Sensor

The APDS-9960 gesture sensor is a multi-function sensor. It is an IR sensor. It can detect the gestures, ambient light, and RGB values in the light. It communicates with other devices via the I2C protocol. The required voltage for this sensor is 3.3V.
This gesture sensor has an IR Led and four photo-diodes. IR LED emits IR waves. Moreover, photo-diodes detect the reflected IR energy, which is transmitted by an onboard LED. These photo-diodes are constantly looking for IR radiation. This IR radiation is reflected in the photo-diodes. This received energy by photo-diodes is processed further.
Several parameters are calculated by using this energy, like direction, the velocity of the moved body. Then, this information is converted into digital format, and by using this digital information, a gesture is computed.
Pinout of APDS-9960 Gesture Sensor
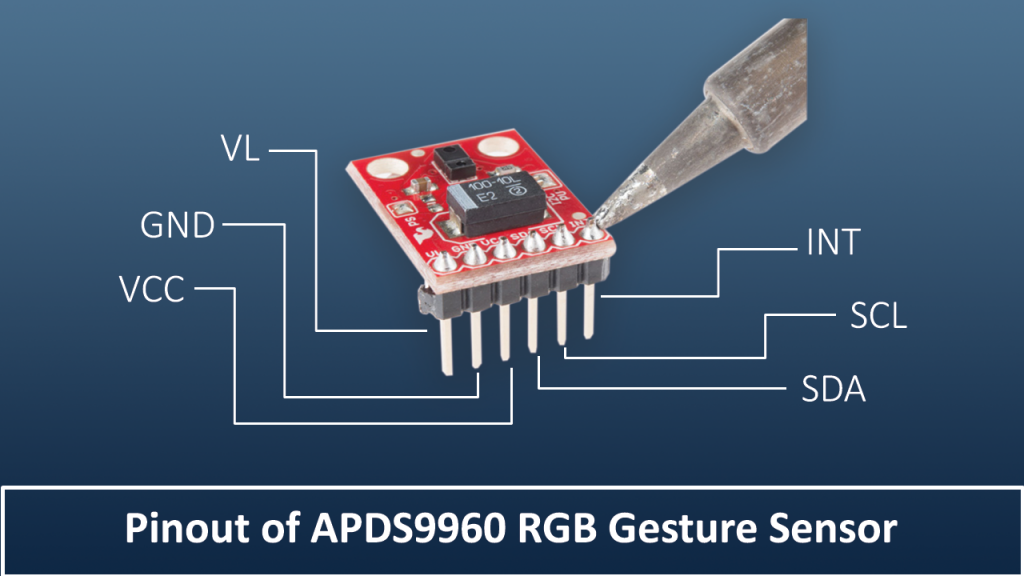
| Pin | Description |
| VL | Optional power to the IR LED if PS jumper is disconnected. Must be 3.0 – 4.5V |
| GND | Connect to ground. |
| VCC | Used to power the APDS-9960 sensor. Must be 2.4 – 3.6V |
| SDA | I2C data |
| SCL | I2C clock |
| INT | External interrupt pin. Active LOW on interrupt event |
On the front of the sensor, there are two soldered jumpers.
PS – This jumper connects the power supplies of the sensor and IR LED together. When the jumper is closed (i.e., connected), you only need to supply power to the VCC pin to power both the sensor and the IR LED. However, if the jumper is open, you need to provide power to both the VCC (2.4 – 3.6V) and VL (3.0 – 4.5V) pins separately. This jumper is closed by default.
I2C PU – This is a 3-way solder jumper used to connect and disconnect the I2C pull-up resistors. By default, this jumper is closed, which means that both SDA and SCL lines have connected pull-up resistors on the breakout board.
Interfacing of Gesture Sensor With Arduino
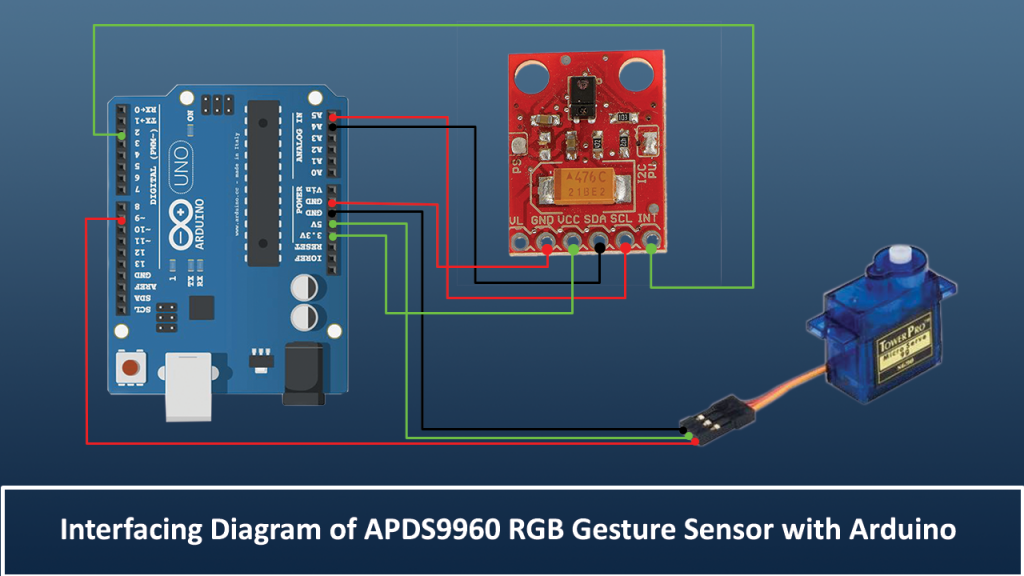
Here we are going to control a simple servo motor by using this gesture sensor.
- Connect the VCC of the sensor to the 3.3V of the Arduino.
- Connect the GND of the sensor to the GND of the Arduino.
- Connect SCL to the PIN A5 of the Arduino.
- Connect SDA to the PIN A4 Of the Arduino.
- Connect INT pin to PIN 2 of the Arduino.
- Connect the VCC of the servo motor to 5V of Arduino.
- Connect the GND of the servo motor to the GND of the Arduino.
- Connect the signal pin of the Servo motor to PIN 9 of the Arduino.
Applications Of APDS-9960 RGB and Gesture Sensor
- APDS-9960 is used in Touch screens of smartphones.
- For Mechanical switch replacement, this device is used.
- Calculate the color and the temperature, RGB sensing of APDS-9960 is used.
- For Adjustment of the backlight of TV, smartphones, etc.… the proximity sensing engine of the APDS-9960 device is used.
- Gesture robotics also make use of different sensing engines present in this device.
- In medical equipment.
- LCD Displays.
- RGB monitors and for RGB rating APDS-9960 is used.
Advantages of APDS-9960 RGB and Gesture Sensor
- It can easily replace the mouse and keyboard.
- It can navigate in a virtual environment.
- It can interact with the 3D world.
- No physical contact is needed.
Final Words
Thanks for being here till the end. Hope all your concepts regarding gestures and gesture sensors got cleared. If you like this article, please share it and let me know in the comment section.