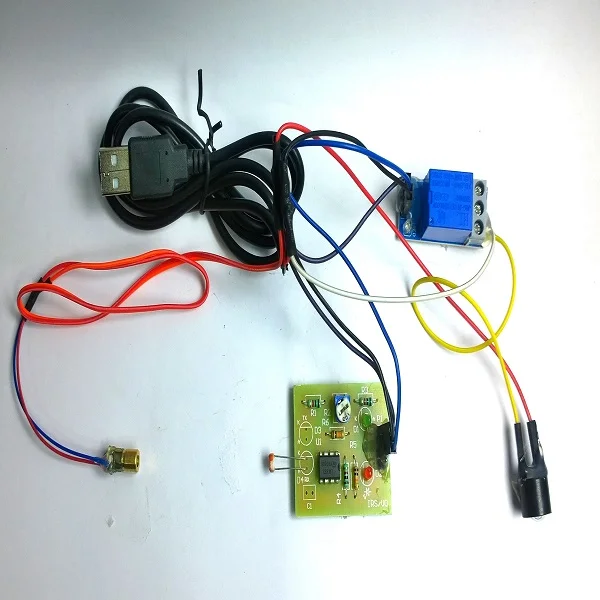
If you’re thinking of diving into the world of electronics, the Laser Alarm DIY Science STEM Kit is an excellent choice. It’s not only a fun project, but it also serves as a fantastic introduction to the world of automation and security systems. Let’s explore how this kit works, and how you can easily set it up in your own space.
Step-by-Step Guide to Setting Up Your Laser Alarm System:
Unbox the Kit: Once you open the box, you’ll find that the system is fully assembled and ready to use. The kit includes all the necessary components, including a laser pointer, Light Dependent Resistor (LDR), and the buzzer.
Place the Laser and Sensor: Position the laser pointer so that it shines across the path of the LDR. This setup mimics a “tripwire” system, where if anything (or anyone) crosses the beam, it will trigger the alarm.
Power On: After connecting the system to a power source, the LDR will be actively detecting any changes in light. When the laser beam is broken, the LDR changes its resistance, sending a signal to activate the buzzer.
Test the System: It’s time to test your new security system! Try interrupting the laser beam and see how the buzzer reacts. If everything is set up correctly, the alarm should sound whenever the beam is interrupted.
Real-World Application: Imagine using this system as a simple, homemade security alarm for your front door or even as a model for a school project. This setup can be further customized to create more sophisticated systems for robotics, automation, or even advanced home security simulations.
Customer Testimonials:
- “This kit was perfect for my students to understand how light-based security systems work. They loved the hands-on approach!” – Emma L., STEM Educator
- “I never thought I could build a working alarm system, but this kit made it so easy to understand. It’s fun, educational, and effective.” – Jake M., DIY Enthusiast
Now that you know how easy and rewarding it is to set up your own laser alarm system, why not take the plunge? The Laser Alarm DIY STEM Kit is affordable, educational, and an exciting way to explore electronics. Get yours today and start learning!
Written by smartxbrains
- Industrial Automation141141 products
- Cooling Fan44 products
- Indicators1111 products
- Plastic Casing66 products
- Sensor2323 products
- Sleeve and cables55 products
- SMPS88 products
- Solid State Relay Module22 products
- Switches1818 products
- Temprature Sensor11 product
- 3D Printing189189 products
- 3D printing118118 products
- Combination Kit4747 products
- Electronic743743 products
- Audio55 products
- Battery/Charger Accessories2828 products
- Capacitors6464 products
- Connector4646 products
- cooling fan11 product
- Diode3535 products
- Displays1212 products
- IC and Chips6565 products
- IOT and Wireless99 products
- Leds2424 products
- Microcontrollers55 products
- Modules/Shield7575 products
- MOSFET / IGBT1414 products
- Power Supply2525 products
- Resistors130130 products
- Sensors5959 products
- SMD2828 products
- Switches1414 products
- Transistors6868 products
- Wire and Cables1212 products
- Hardware3232 products
- Hand Tools1414 products
- Hardware Accessories1414 products
- Printing22 products
- RC Plane and Drone99 products
- Robotic147147 products
- BO Motors1313 products
- General Purpose DC Motors2929 products
- Motor Drivers88 products
- Robotic Wheels & Tyres1414 products
- Servo Motor2727 products
- Stepper Motors88 products
- Synchronous Motor11 product
- Science Fair Project7070 products
- Final Year Ready Project Kit11 product
- STEM KIT2222 products
- E Books88 products


Leave a Reply
You must be logged in to post a comment.