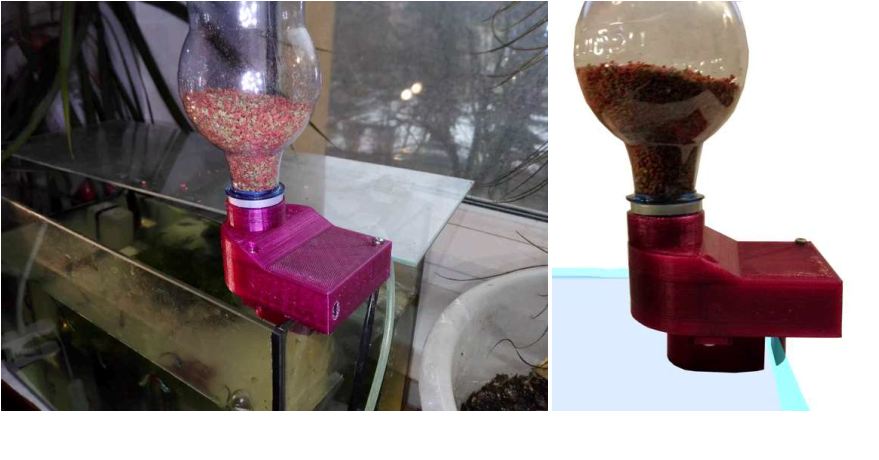
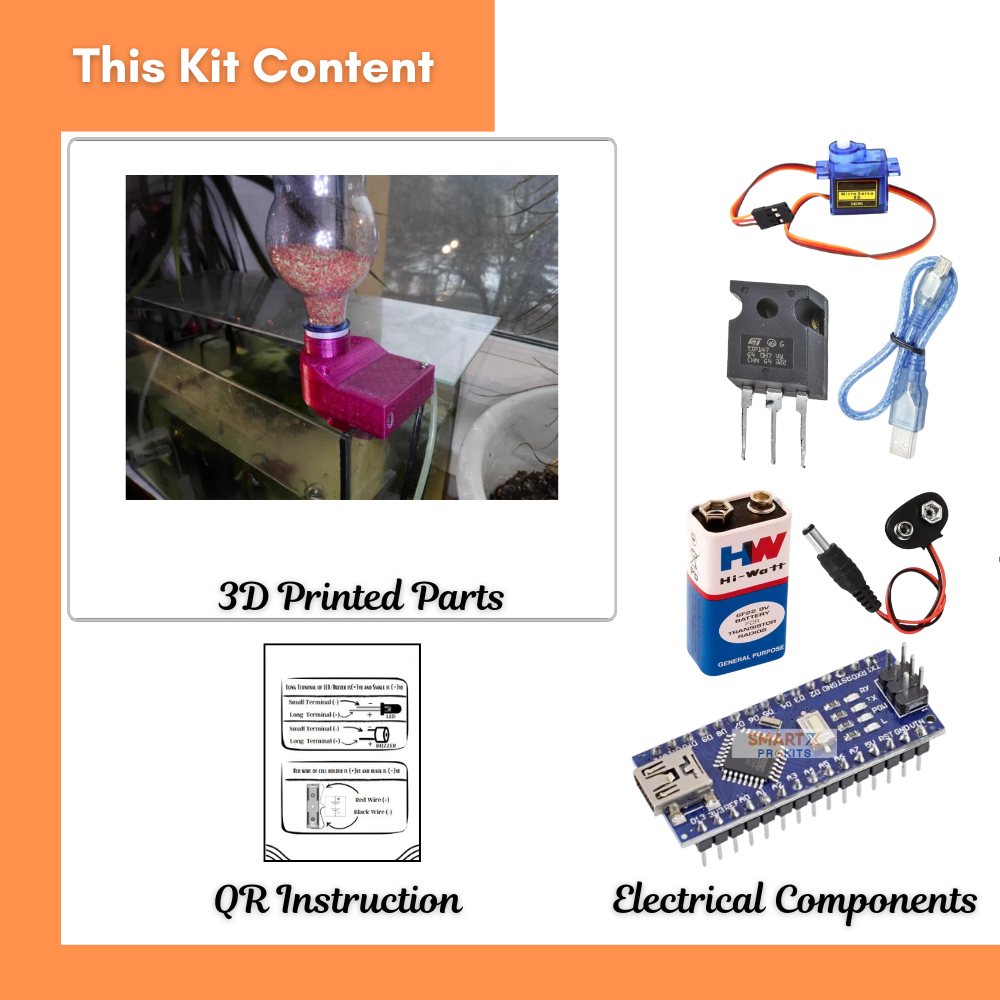
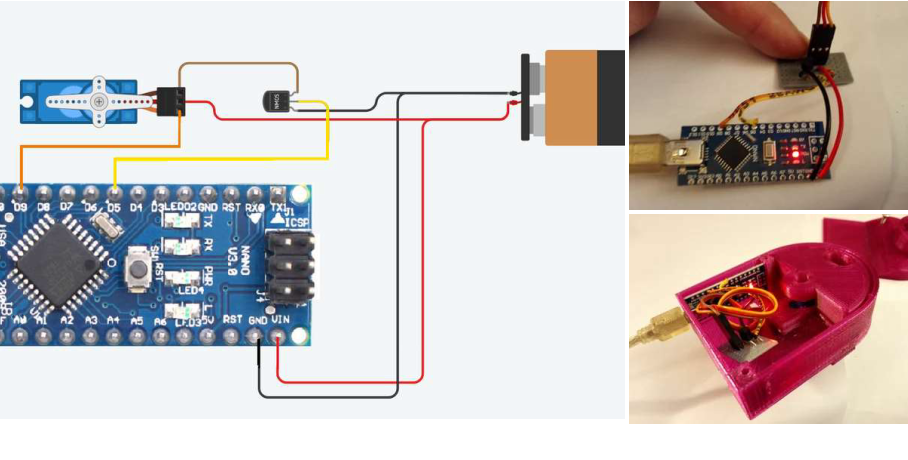
Keeping your aquarium fish fed on time is essential, but sometimes you might not be at home. With this DIY Automatic Fish Feeder, you can automate feeding using just an Arduino, servo motor, and simple delay-based code. This version doesn’t need an RTC module, making it easier and cheaper to build.

This project is perfect for beginners, aquarium owners, and STEM students who want a quick and effective automation project.

🛠️ Components Required

Arduino Uno (or compatible board)

Servo Motor (for rotating food dispenser)

Small Food Container or 3D Printed Feeder Drum

Breadboard & Jumper Wires

Power Supply (USB/Adapter/Power Bank)

Circuit Diagram & Pin Connections

Connect the components as follows:

Servo Motor Signal Pin → Digital Pin 9

Servo Motor VCC5V

Servo Motor GNDGND

That’s it! Just a single servo connected to the Arduino.

Arduino Code for Automatic Fish Feeder (Without RTC)

This code uses simple delays to feed fish every 12 hours (adjustable).

Circuit Diagram

Arduino Code

#include <Servo.h>

// ———- Servo Setup ———-
Servo foodServo; // Servo for dispensing fish food

// ———- Constants ———-
const int SERVO_PIN = 9; // Servo control pin
const int FEED_INTERVAL = 43200000; // 12 hours in milliseconds
const int DISPENSE_ANGLE = 90; // Angle to dispense food
const int REST_ANGLE = 0; // Normal position
const int DISPENSE_TIME = 1000; // 1 second to rotate and drop food

// ———- Setup ———-
void setup() {
foodServo.attach(SERVO_PIN);
foodServo.write(REST_ANGLE); // Start in the normal position
}

// ———- Main Loop ———-
void loop() {
// Run feeding cycle
dispenseFood();

// Wait for the next feeding time
delay(FEED_INTERVAL);
}

// ———- Function: Dispense Food ———-
void dispenseFood() {
// Rotate servo to drop food
foodServo.write(DISPENSE_ANGLE);
delay(DISPENSE_TIME);

// Return to rest position
foodServo.write(REST_ANGLE);
}

Video

🔧 How it Works

When the Arduino powers up, the loop runs and dispenses food.

It then waits 12 hours (43200000 ms) before feeding again.

You can change the delay value to:

6 hours → 21600000

8 hours → 28800000

24 hours → 86400000

Testing & Adjustments

Upload the code to your Arduino.

Attach the servo to your food container or 3D printed drum.

Test the dispensing motion — change servo.write(90) angle if too much/less food is released.

Adjust delay values depending on how often you want to feed your fish.

Conclusion

This DIY Arduino Automatic Fish Feeder without RTC is one of the easiest automation projects for aquarium lovers. It uses just an Arduino, a servo, and a container to release food at fixed intervals.

Perfect for DIY makers, aquarium hobbyists, and students, this project ensures your fish are always fed on time while giving you hands-on experience with Arduino and servo motor control.

🚀 Upgrade ideas: Add an LCD, WiFi control, or a mobile app later to make it smarter!