


Beginner Project: Build a Bluetooth Controlled Robot Car with Arduino
🎯 Project Overview
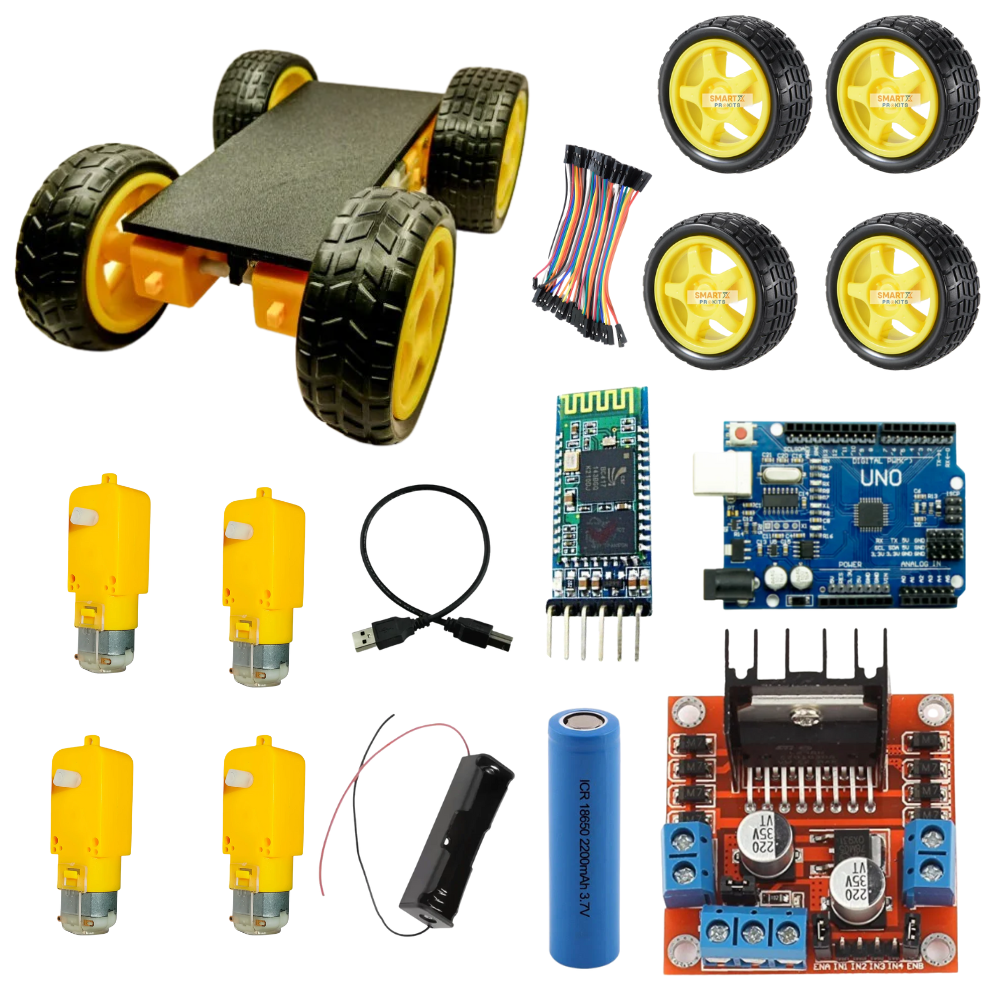
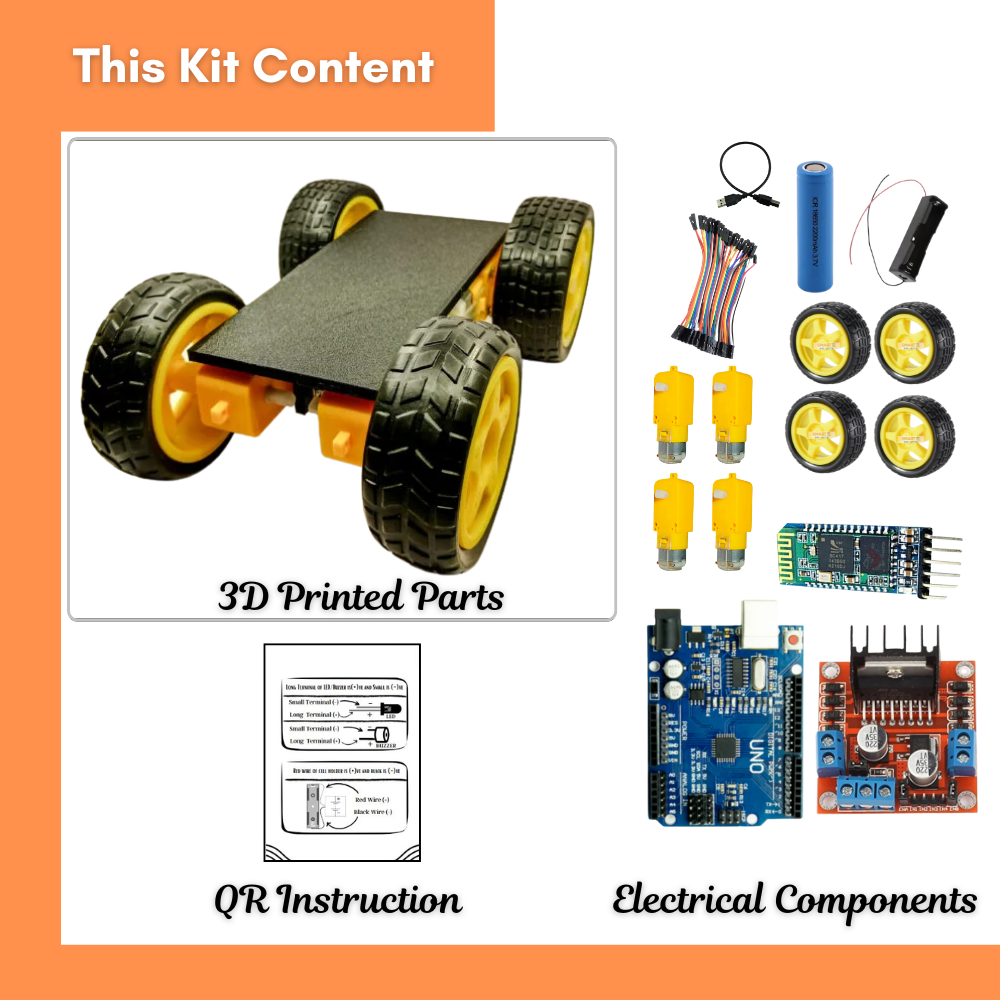
In this project, we will build a Bluetooth-controlled robot car using an Arduino UNO-compatible board, L298N motor driver, HC-05 Bluetooth module, and 4 BO motors with wheels.
This is a great beginner project to learn about Arduino, motor drivers, Bluetooth communication, and robotics.
You will control the robot from your smartphone using a Bluetooth app.
🛠️ Components Required
Arduino UNO-compatible board
L298N Motor Driver Module
4 × BO Motors with Wheels
Robot Chassis (3D Printed or ready-made)
HC-05 Bluetooth Module
Battery Holder + 1200mAh Battery
10 × Female-to-Female Jumper Wires
Screws, nuts, and accessories for mounting
🛠️ Parts Needed
Arduino Uno (or Nano)
L298N motor driver (1 or 2 depending on current)
4 × DC motors with wheels
HC-05 Bluetooth module
HC-SR04 ultrasonic sensor
Battery pack (7.4–12 V Li-ion recommended)
Jumper wires + switch
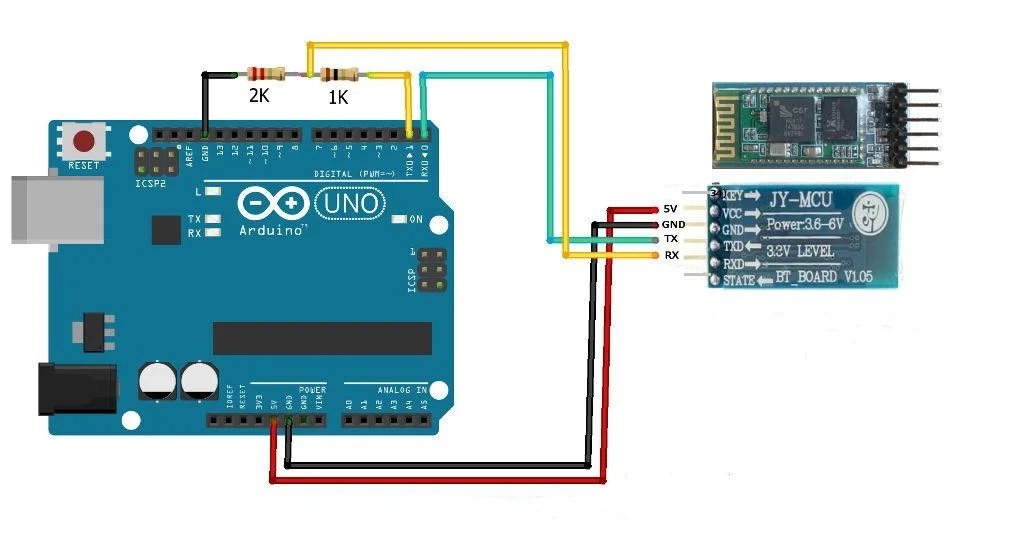
Pin Connections
| Component | Arduino Pin | Notes |
|---|---|---|
| HC-05 TX | D2 | Connect via SoftwareSerial |
| HC-05 RX | D3 | Use a voltage divider (5V → 3.3V) |
| L298N ENA | D5 (PWM) | Speed control – Left motors |
| L298N IN1 | D7 | Left motor direction |
| L298N IN2 | D8 | Left motor direction |
| L298N ENB | D6 (PWM) | Speed control – Right motors |
| L298N IN3 | D9 | Right motor direction |
| L298N IN4 | D10 | Right motor direction |
| Motors | OUT1/OUT2 → Left OUT3/OUT4 → Right |
Connected to L298N outputs |
| Battery + | L298N +12V | Powers motors |
| Battery – | L298N GND + Arduino GND | Common ground |
| Arduino 5V & GND | To L298N & HC-05 | Shared supply |
Circuit Diagram
Arduino Code
#include <SoftwareSerial.h>
// ———- Bluetooth ———-
SoftwareSerial BT(2, 3); // D2 = RX, D3 = TX for Bluetooth HC-05
// ———- Motor Driver Pins ———-
#define ENA 5 // Left motor speed (PWM)
#define IN1 7
#define IN2 8
#define ENB 6 // Right motor speed (PWM)
#define IN3 9
#define IN4 10
// ———- Variables ———-
int speedCar = 180; // Speed range: 0 – 255
// ———- Setup ———-
void setup() {
pinMode(ENA, OUTPUT);
pinMode(ENB, OUTPUT);
pinMode(IN1, OUTPUT);
pinMode(IN2, OUTPUT);
pinMode(IN3, OUTPUT);
pinMode(IN4, OUTPUT);
analogWrite(ENA, speedCar);
analogWrite(ENB, speedCar);
BT.begin(9600); // Default baud rate for HC-05
Serial.begin(9600); // Debugging
Serial.println(“Bluetooth Robot Ready!“);
}
// ———- Main Loop ———-
void loop() {
if (BT.available()) {
char command = BT.read();
Serial.println(command);
switch (command) {
case ‘F‘: forward(); break;
case ‘B‘: backward(); break;
case ‘L‘: leftTurn(); break;
case ‘R‘: rightTurn(); break;
case ‘S‘: stopCar(); break;
case ‘0‘ … ‘9‘: // Speed control
speedCar = map(command – ‘0’, 0, 9, 80, 255);
analogWrite(ENA, speedCar);
analogWrite(ENB, speedCar);
Serial.print(“Speed set to: “);
Serial.println(speedCar);
break;
}
}
}
// ———- Movement Functions ———-
void forward() {
digitalWrite(IN1, HIGH); digitalWrite(IN2, LOW);
digitalWrite(IN3, HIGH); digitalWrite(IN4, LOW);
}
void backward() {
digitalWrite(IN1, LOW); digitalWrite(IN2, HIGH);
digitalWrite(IN3, LOW); digitalWrite(IN4, HIGH);
}
void leftTurn() {
digitalWrite(IN1, LOW); digitalWrite(IN2, HIGH);
digitalWrite(IN3, HIGH); digitalWrite(IN4, LOW);
}
void rightTurn() {
digitalWrite(IN1, HIGH); digitalWrite(IN2, LOW);
digitalWrite(IN3, LOW); digitalWrite(IN4, HIGH);
}
void stopCar() {
digitalWrite(IN1, LOW); digitalWrite(IN2, LOW);
digitalWrite(IN3, LOW); digitalWrite(IN4, LOW);
}
📱 How to Control from Mobile
Install “Arduino Bluetooth Controller” or any Bluetooth terminal app.
Pair your phone with HC-05 (PIN = 1234 or 0000).
Send commands from your phone:
| Command | Action |
|---|---|
| F | Move Forward |
| B | Move Backward |
| L | Turn Left |
| R | Turn Right |
| S | Stop |
| 0–9 | Adjust Speed |
Teamwork Idea
Team A: Assemble chassis + motors
Team B: Do wiring & connections
Team C: Upload code + test via Bluetooth
Conclusion
Now you have built a Bluetooth-controlled robot car 🚗💨 using Arduino!
This simple but exciting project teaches you motor control, Bluetooth communication, and Arduino coding — the foundation of robotics.